

Table of Contents
ToggleA cramped kitchen doesn’t have to stay cramped. Whether you’re working with a galley layout, an outdated floor plan, or just too much clutter, smart small kitchen renovations can transform the space without gutting walls or very costly. The key is making strategic choices about layout, storage, lighting, and finishes that create the illusion of space while improving function. This guide walks through practical, DIY-friendly approaches to maximize every square foot and turn your kitchen into a place you actually want to cook in.
Key Takeaways
- Small kitchen renovations can maximize space and functionality through strategic layout planning, smart storage solutions, and lighting upgrades without requiring extensive structural work.
- Optimize your work triangle—the distance between sink, stove, and refrigerator—to between 26 and 30 feet to minimize wasted steps and improve cooking efficiency.
- Upgrade lighting with layered solutions like under-cabinet LED strips ($25–$60, 20 minutes to install) and low-profile flush mounts to create depth and prevent cramped feelings.
- Refacing existing cabinets ($3,000–$8,000) instead of full replacement, combined with vertical storage and multi-functional pieces, delivers 80% of visual impact for 20% of the cost.
- Cosmetic updates like painting, backsplash tiling, and hardware swaps are DIY-friendly; hire licensed professionals for electrical, plumbing, and structural changes to ensure code compliance and safety.
Plan Your Layout For Maximum Functionality
Before you tear out cabinets or repaint, nail down the layout. In small kitchens, the classic “work triangle”, the distance between sink, stove, and refrigerator, becomes even more critical. Ideally, the total perimeter of this triangle should be between 26 and 30 feet: anything tighter or wider wastes steps, anything tighter creates congestion.
Start by sketching your kitchen to scale (use 1/4″ = 1′ graph paper or a free online tool). Mark your fixed points: plumbing (sink location), electrical (where the stove connects), and window locations. These rarely move without professional help. Next, look at your traffic flow. If the door swings into the cooking zone or blocks a cabinet you need to open daily, even a small layout shift pays dividends.
Consider the single-wall (galley), L-shaped, or U-shaped options available in your footprint. Many small kitchens work best as galley layouts with appliances and counters on opposite walls, which creates clear zones and minimizes wasted movement. If you’re knocking down a wall or relocating appliances, that’s structural and electrical work, you’ll need permits and possibly a licensed contractor.
Choose Space-Saving Cabinet and Storage Solutions
Cabinetry typically eats up 40% of a kitchen’s budget but defines functionality. In tight spaces, every cabinet inch counts. Replace deep, awkward corner cabinets with pull-out shelves or lazy Susans that let you access items without fishing around. Consider shallow wall cabinets (10″ deep instead of the standard 12″) to maintain sightlines and prevent the kitchen from feeling boxed in.
If you’re replacing cabinets entirely, pre-made modular systems (like those from IKEA or Kraftmaid) are DIY-friendly and cheaper than custom builds. Measure twice, three times, cabinet installation tolerances are tight, and walls aren’t always square. You may need to install shims (thin wedges) to ensure doors hang straight.
Vertical Storage and Multi-Functional Cabinetry
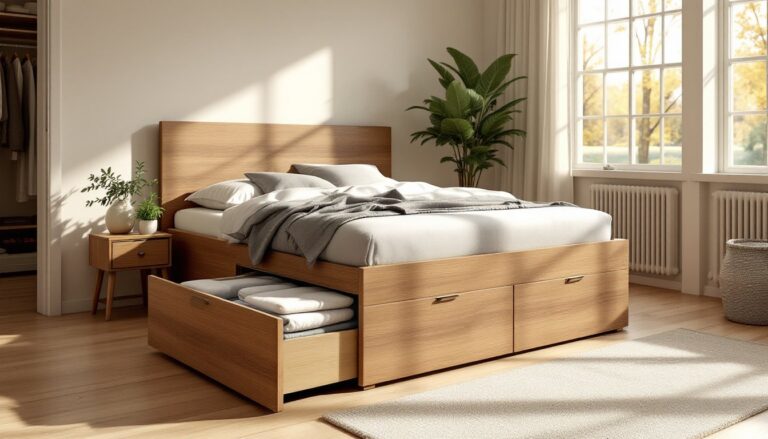
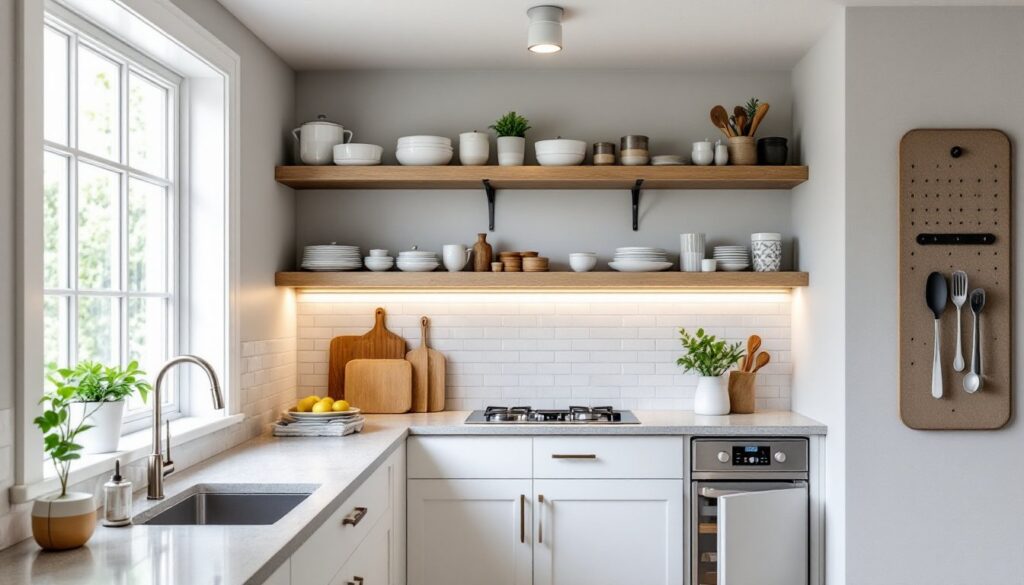
Go vertical. Wall-to-ceiling cabinets reclaim space that would otherwise sit empty. Open shelving works in small kitchens if you’re disciplined about keeping them styled: otherwise, closed cabinets hide clutter better. Pegboards and hooks on an empty wall are cheap, removable, and perfect for hanging utensils and small pots.
Multi-functional cabinetry means pieces that pull double duty. A narrow pantry pull-out cabinet can fit into a 6″-wide gap. Tall pantry cabinets consolidate flour, sugar, and canned goods into one vertical stack instead of spreading them across multiple shelves. Under-sink organizers with adjustable shelves let you fit cleaning supplies and trash bins neatly.
When choosing cabinet hardware, small knobs and pulls take up less visual space than large bar handles. Brushed nickel or matte black hardware feels modern without demanding visual attention. Installation is straightforward: drill pilot holes, screw in handles, and you’re done. Budget about 30 minutes per drawer or door if you’re doing it yourself.
Select Lighting and Finishes That Expand the Space
Lighting makes or breaks a small kitchen. Poor lighting makes even a clean space feel cramped and dingy. Layer three types: ambient (ceiling fixtures or a flush mount for overall brightness), task (under-cabinet lights for countertop work), and accent (maybe a small pendant over an island or eat-at counter).
Under-cabinet LED strips are the easiest DIY lighting upgrade. They mount with adhesive or small brackets, plug into an outlet or hardwire into a switch, and cast light directly onto work surfaces without glare. They also visually lift wall cabinets off the wall, creating depth. A single run costs $25–$60 and takes 20 minutes to install.
For ceiling lighting, swap out a bulky fixture for a low-profile flush mount (2–4″ from the ceiling). Recessed lights work too, but require cutting into drywall and running electrical, that’s a job for an electrician unless you’re very comfortable in the electrical box. Choose warm white (2700K) or neutral white (3000K) LED bulbs for kitchens: cool white (5000K) feels sterile and makes small spaces feel colder.
Finishes magnify space visually. Light, neutral paint (whites, soft grays, warm taupes) on walls and ceilings reflect light and open up the room. Glossy or semi-gloss finishes bounce light more than matte: they’re also easier to clean, which matters in a kitchen. Avoid dark colors unless you love a cozy, dramatic look, they absorb light and compress the space. Your cabinet finish is usually fixed, but if they’re wood, a fresh stain or paint job (with proper prep and primer) transforms the kitchen. High-gloss painted cabinets look contemporary and reflect light: matte finishes are forgiving and hide fingerprints.
Budget-Friendly Updates That Make a Big Impact
You don’t need to replace everything. Cosmetic swaps often deliver 80% of the visual impact for 20% of the cost. Reface existing cabinets by replacing doors and drawer fronts instead of gutting the whole system, you keep the solid boxes (which are fine) and swap in new facings. Refacing typically costs $3,000–$8,000, versus $15,000+ for full replacement.
Countertops are another high-impact area. Laminate has a bad reputation, but modern laminate mimics butcher block or concrete convincingly and costs $10–$15 per square foot installed. Quartz or granite run $30–$50 per square foot. If your existing counters are structurally sound (no deep cracks or water damage), a fresh paint or stain can hold you over for a few years. Epoxy countertop coatings are trendy, relatively cheap ($300–$800 total), and DIY-friendly, but they require meticulous surface prep and cure time (24–72 hours of no use).
Backsplash is easy and visible. Subway tile (3″ × 6″ ceramic) is classic, affordable, and installed with mastic adhesive and grout. A 30–40 square-foot backsplash behind counters runs $200–$500 in materials. Peel-and-stick backsplash tiles are real but look cheap up close: avoid unless temporary. Paint is the cheapest refresh: a gallon of high-quality kitchen paint (semi-gloss or satin) costs $40–$60 and covers about 300 square feet. You’ll need primer if there’s staining or color shift.
For design inspiration, The Kitchn regularly features small kitchen solutions and Remodelista has a detailed small kitchen remodel guide with product recommendations. Both are solid references for sourcing affordable elements and seeing what works.
DIY-Friendly Installation Tips and Common Mistakes to Avoid
Many small kitchen updates are realistic DIY projects if you’re careful. Backsplash tiling, painting, hardware swaps, and under-cabinet lighting are all manageable. Cabinets and countertops require precision: even 1/8″ out of square cascades into problems.
Critical prep: Remove trim, outlet covers, and switch plates before painting. Tape off areas you don’t want painted (use painter’s tape, not masking tape, it’s sharper and less likely to bleed). Prime first if there’s water staining, tannin bleed from wood, or a color shift. One coat of primer plus two coats of paint is standard: don’t skip the primer hoping to save time.
For tile work, ensure the wall is flat (use a straightedge to check). Uneven walls mean uneven grout lines, which look amateurish. Mix thinset mortar (not mastic adhesive for large areas, it doesn’t hold weight as well) to a peanut butter consistency. Comb it at a 45° angle with the toothed side of a notched trowel, using consistent pressure. Tiles should “butter” slightly, some mortar should squeeze from the joints when you set them. Grout after the thinset cures (check instructions: usually 24 hours). Seal grout if it’s not pre-sealed, especially in splashback areas where moisture is high.
Common mistakes: Not acclimating materials. If you bring a pallet of tile or wood cabinets into a cold, damp kitchen, they’ll expand or contract once installed, and door frames become crooked. Let materials sit in the space for 48 hours before installation.
Second: rushing layout. Measure and dry-lay everything before committing with adhesive. A small misalignment compounds across a room.
Third: ignoring ventilation. If you’re painting or applying adhesives, open windows and wear a respirator (not just a dust mask). Some primers and paints off-gas, and poor ventilation creates headaches, literal and figurative.
When in doubt, hire a pro. 25 Small Kitchen Remodel Ideas on Houzz shows what experienced designers accomplish, and while many are design-heavy, they also showcase smart storage and layout solutions worth studying. Electrical work (rewiring, adding outlets, new hardwired fixtures) requires a licensed electrician in most jurisdictions. Plumbing moves (sink relocation, new gas lines) need a plumber. Structural changes (removing or adding walls) always need permits and often require an engineer’s sign-off.
Conclusion
Small kitchen renovations don’t require emptying your wallet or living in chaos for months. Start with layout and storage, layer in lighting and finishes, and tackle cosmetic updates yourself where you’re confident. Focus on the work triangle, eliminate dead zones, and add vertical storage to transform cramped into clever. Be honest about your skills, hire a pro for permits, structural work, and electrical. The result is a kitchen that feels bigger, functions better, and actually gets used.