


Table of Contents
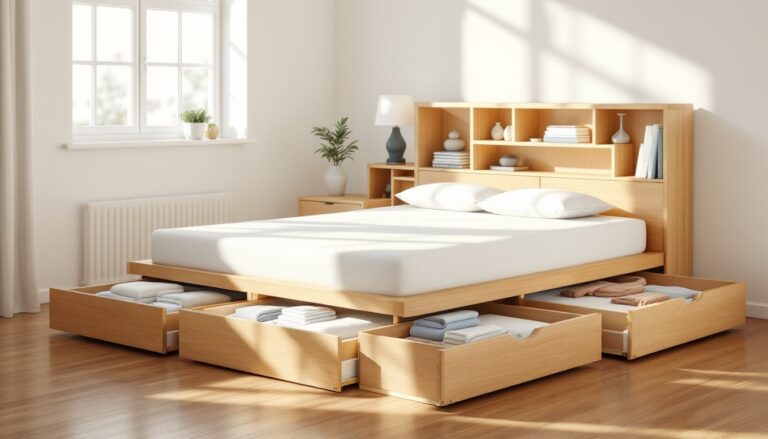
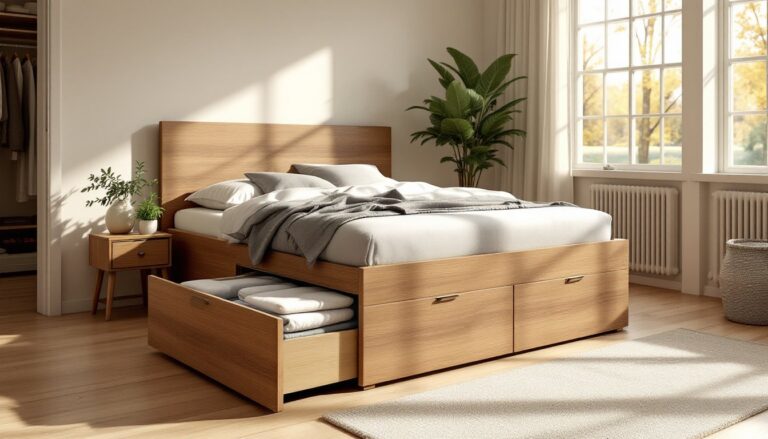
ToggleA platform bed with built-in storage and headboard is one of the best space-saving investments a homeowner can make. Unlike traditional bed frames, a wood platform bed with storage eliminates the need for a separate nightstand, maximizes under-bed space for blankets and seasonal gear, and gives your bedroom a custom, finished look. Whether you’re furnishing a guest room, kids’ bedroom, or master suite, building one yourself saves money compared to custom furniture while letting you control materials, dimensions, and design. This guide walks you through the entire process, from material selection to final assembly, so you can tackle this project confidently.
Key Takeaways
- A wood platform bed with storage and headboard eliminates the need for a box spring, maximizes floor space, and creates a custom bedroom focal point in one multipurpose piece.
- Building your own platform bed with storage saves money compared to custom furniture while allowing you to control exact dimensions, materials, and design to fit your room perfectly.
- Pressure-treated lumber for the platform base and cabinet-grade plywood for storage compartments ensure durability and a finished appearance that outlasts particleboard alternatives.
- Installing support joists 16 inches on center and adding a center rail prevents sagging and ensures your wood platform bed stays structurally sound for years.
- Optional casters on storage boxes and pocket-hole joinery for the headboard frame reduce assembly time by 30–40% while delivering professional-quality results.
- Design customization options—from modern minimalist to rustic farmhouse or industrial chic—let you match your storage platform bed with any bedroom aesthetic.
Why Choose a Platform Bed with Storage and Headboard
A platform bed with integrated storage solves multiple bedroom challenges at once. First, the solid wooden platform eliminates the need for a box spring, reducing cost and simplifying assembly. Second, built-in storage compartments under or beside the bed reclaim floor space, critical in smaller bedrooms where every square foot matters. Third, a custom headboard adds visual weight and personality while creating a finished focal point.
From a practical standpoint, wood platform beds are durable and age better than particleboard alternatives. They’re also repairable: a scratched rail can be sanded and refinished, while a broken slat is a simple replacement. If you ever move, disassembling and transporting a well-built wood bed is straightforward. Plus, building your own means you can specify the exact height, width, and storage configuration to match your room and needs, something stock furniture rarely offers perfectly.
The headboard also functions as a sound and draft barrier, especially important if your bedroom faces a busy street or exterior wall. It’s both functional and aesthetic, making the entire piece feel intentional rather than improvised.
Essential Materials and Tools You’ll Need
Materials
- 2×10 or 2×12 pressure-treated lumber (for frame perimeter: 2×10 nominal is 9.25″ actual depth)
- 2×6 pressure-treated or standard lumber (for support joists: space joists 16″ on center)
- 2×4 lumber (for headboard frame and storage box sides)
- 3/4″ plywood (for headboard backing and storage compartment bottoms: cabinet-grade plywood looks better than construction-grade)
- 1×12 or 1×10 pine (for storage drawer fronts and headboard trim)
- 2.5″ wood screws (for frame assembly: use structural screws for outdoor pressure-treated lumber)
- 1.25″ pocket-hole screws (for headboard joinery)
- Wood glue, 120-grit and 180-grit sandpaper, wood stain or paint (polyurethane for finish)
- Casters or felt pads (optional, for mobile storage drawers)
Lumber note: Pressure-treated wood (PT) resists rot and costs slightly more than standard pine, but it’s worth it for the platform base. Acclimate all lumber to your bedroom’s humidity for 48 hours before assembly, this prevents warping and joint gaps later.
Tools
- Miter saw (for clean crosscuts: circular saw works but is less precise)
- Pocket-hole jig (like a Kreg Jig, ~$30–60: transforms headboard assembly)
- Power drill and bits (including countersink bits)
- Orbital sander (renting one costs ~$15/day and saves hours)
- Level, measuring tape, square, pencil
- Clamps (at least 4 bar clamps for glue-ups)
- Safety glasses, work gloves, dust mask (especially when sanding or cutting PT lumber)
- Stud finder (if fastening headboard to wall studs for stability)
A miter saw and pocket-hole jig aren’t mandatory, but they cut assembly time by 30–40% and improve joint quality, both worth considering if you don’t already own them.
Step-by-Step Building Guide
Constructing the Platform Base
-
Cut frame pieces to size. For a queen bed (60″ × 80″ finished), cut two 2×12 boards to 80″ (length) and two to 60″ (width). Sand all pieces smooth (120-grit minimum) to avoid splinters during assembly.
-
Assemble the frame. Lay pieces in a rectangle on a flat surface. Use a speed square to check corners for 90°. Pre-drill holes to avoid splitting, then drive 2.5″ screws (3 screws per corner). Pocket holes work beautifully here too, hiding fasteners completely.
-
Install support joists. Measure in 16″ from the first joist and mark across both long sides. Cut 2×6 boards to span the width (58.5″ for a queen to fit inside the frame). Screw joists down to the frame rails using 2″ screws, 2 screws per joist per rail. This spacing prevents sagging under weight.
-
Add a center support rail (optional but recommended for queen/king beds). Run a 2×6 down the middle, perpendicular to joists, to reduce deflection in the mattress.
-
Test the frame for level and square before moving forward. Adjust feet or shim as needed.
Adding Storage Compartments
-
Plan your layout. Decide if you want drawers along the foot, a box under one side, or compartments across the front. Sketch dimensions, most drawer boxes are 18″–24″ deep, 16″–20″ wide, and 12″–16″ tall.
-
Build storage boxes. Use 2×4 lumber for the frame and 3/4″ plywood for bottoms and sides. Pocket-hole joinery makes this fast and clean. A drawer box under a queen bed (say, 48″ wide × 18″ deep × 14″ tall) requires about $60–80 in materials.
-
Install casters (optional). Screw lockable swivel casters to the bottom of each box so drawers roll smoothly. This is a game-changer for accessibility.
-
Attach drawer fronts. Cut 1×12 pine to match box width and height, then screw or pocket-hole it to the box frame from inside. Sand and finish to match your headboard.
-
Position boxes under the platform. Slide them into place flush with the frame edge. Use felt pads or casters, not raw wood on flooring, you want smooth operation and floor protection.
Building storage compartments takes the longest (4–6 hours for 2–3 boxes), so don’t rush. Double-check that drawers slide freely before painting.
Installing the Headboard
-
Frame the headboard. Build a 2×4 frame sized to match your bed width (60″ wide for a queen) and desired height (48″–60″ is typical). Use pocket holes for a clean, screwless look. Brace the frame with horizontal 2×4s spaced every 16″ to prevent racking.
-
Attach plywood backing. Cut 3/4″ plywood to fit the frame. Screw it to the frame from behind using 1.25″ pocket-hole screws every 12″ around the perimeter and middle supports. This creates a solid, finished back.
-
Add trim and detail. Cut 1×12 or 1×10 boards to frame the plywood edges. Use pocket holes or wood glue with brad nails. This trim hides plywood edges and gives the headboard a furniture-quality appearance.
-
Secure to the bed frame or wall. Option A: Screw the headboard directly to the platform frame using heavy-duty L-brackets at the base. Option B: Fasten it to wall studs behind the bed using 3″ lag bolts into studs, this is more stable for taller headboards. Use a stud finder to locate studs.
-
Sand, stain, and finish. Once assembly is complete, sand the entire headboard (180-grit) and apply your chosen finish. Polyurethane adds durability: paint works too. Two coats, with drying time between, ensures a professional result. Existing platform resources like rustic modern platform bed frame designs offer free plans if you want detailed specifications.
Design Ideas and Customization Options
Modern Minimalist
Skip the headboard decorations and go with clean lines. Paint everything white or light gray, add floating shelves on either side, and use sleek metal handles on storage boxes. This look suits smaller bedrooms and feels airy.
Rustic Farmhouse
Use knotty pine or reclaimed-look lumber (authentic reclaimed wood is pricier but stunning). Stain it a warm honey or medium brown, add a herringbone pattern to the headboard backing, and incorporate shiplap. Install metal anchors or simple bracket hardware on storage boxes.
Industrial Chic
Combine dark stained wood with black metal accents, exposed bolt fasteners, steel pipe shelving, and dark hardware. This style pairs well with concrete flooring and exposed brick bedrooms.
Built-In Cubbies
Instead of drawers, add open shelving or cubbies to one side of the headboard. Use 1×12 boards as shelves supported by 2×4 uprights. This provides accessible storage and visual interest. Budget extra time (2–3 hours) and materials (~$100) for this modification.
Upholstered Headboard
After building and finishing the wooden base, wrap the headboard backing with batting and upholstery fabric (leather, linen, or performance fabric). Staple the fabric to the frame back. This adds comfort if you like to sit up in bed and softens the bedroom’s appearance. Expect to spend an additional $200–400 on materials and 3–4 hours on wrapping.
Many DIYers find inspiration and detailed approaches in beginner woodworking guides and budget furniture project showcases that break down customization step-by-step with photo documentation.