


Table of Contents
ToggleMost bathrooms are cramped. Toothbrushes, medications, cleaning supplies, towels, and styling products pile up fast, turning a functional space into chaos. The right bathroom cabinets and storage solutions can transform clutter into organized calm, and actually make your daily routine easier. Whether you’re working with a tight powder room or a spacious master bath, smart storage choices combine practical functionality with visual style. This guide covers everything from assessing what you actually need to choosing the right cabinet type and installing it yourself.
Key Takeaways
- Assess your bathroom storage needs by measuring items in each category and thinking vertically to maximize space, especially in small bathrooms where smart utilization of wall space is critical.
- Quality bathroom cabinet features like full-extension drawer slides with 100-pound capacity and water-resistant topcoats directly impact durability and longevity in moisture-prone bathrooms.
- Vanity cabinets in standard widths (24–60 inches) are the workhorse of bathroom storage, but wall-mounted and medicine cabinets can free up floor space and create visual interest in compact spaces.
- Protect your bathroom cabinets by sealing all raw wood edges and interior surfaces with water-resistant sealer before installation, and wipe spills immediately to prevent water damage.
- Budget-friendly storage solutions like over-the-toilet cabinets ($30–$150), floating shelves, tension rods, and repurposed furniture can organize clutter affordably without major renovations.
- Proper ventilation using exhaust fans during and after showers, combined with monthly maintenance checks of supply lines, keeps bathroom storage systems functional for decades.
Assessing Your Bathroom Storage Needs
Before buying a single cabinet, walk through your bathroom and take honest stock of what needs storage. Most homeowners accumulate far more than they realize, medicines, supplements, hair tools, cleaners, towels, and seasonal items all demand space. Measure what you currently own in each category: How many bottles live under the sink? How many towels do you actually use weekly versus hoard? What about rarely-used items you could store elsewhere?
Think vertically and horizontally. A small bathroom doesn’t need a massive vanity with deep drawers: it needs smart utilization of wall space and corner real estate. If you share the space with a partner or family, discuss storage priorities, does everyone need duplicate grooming supplies, or can you consolidate? Also consider moisture zones: Items near the tub or shower need different protection than those by the sink. Finally, be realistic about daily traffic. Frequently grabbed items (toothbrushes, deodorant, everyday medications) should be within arm’s reach, while occasional-use stuff can live in less accessible spots.
Types of Bathroom Cabinets & Storage Options
Vanity Cabinets & Sink Storage
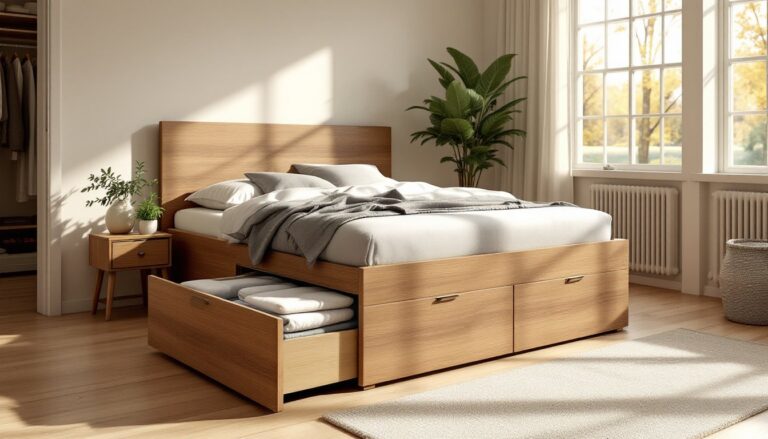
Vanity cabinets sit below the sink and typically include one or two drawers plus a cabinet with shelves or a false front. They’re the workhorse of bathroom storage. Standard vanity widths run 24, 30, 36, 48, and 60 inches, measure your wall space and plumbing rough-in before ordering. Many vanities come pre-fabricated and ready to install: others require assembly and finishing. Depth typically maxes out at 21 inches to avoid sticking into walkways.
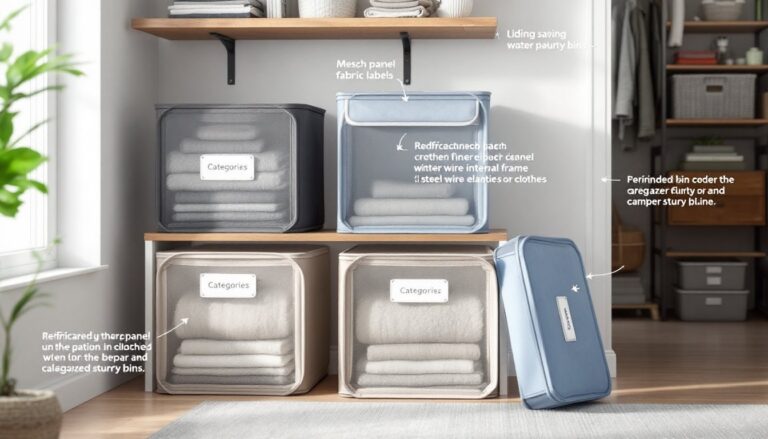
Drawer quality matters hugely. Look for full-extension drawer slides (they glide all the way out, not just partway) with at least 100-pound weight capacity per drawer. Cheaper cabinets use side-mounted slides that jam: better ones use undermount hardware that feels smooth for years. Interior storage varies, some vanities have adjustable shelves, others have fixed partitions. If you’re picky about organization, open shelving inside lets you install custom dividers or bins, while others prefer closed storage to hide visual clutter. Medicine cabinets often nest into the wall above the vanity, creating a compact vertical stack.
Wall-Mounted & Medicine Cabinets
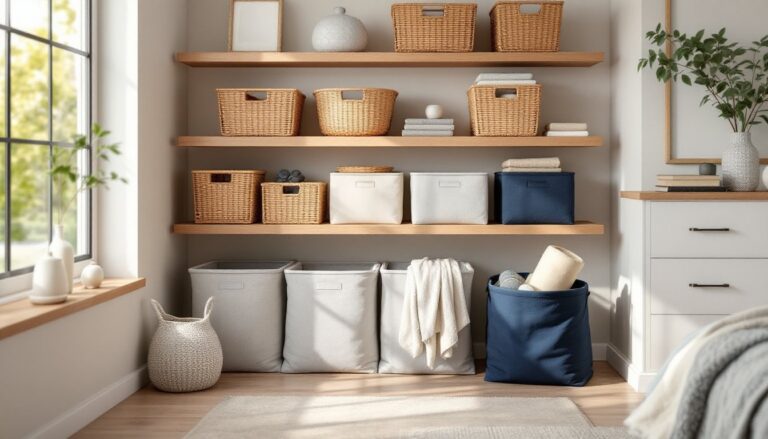
Wall-mounted cabinets and medicine cabinets free up floor space in small bathrooms and create visual interest. Recessed medicine cabinets tuck into the wall cavity (between studs), requiring you to cut into drywall and frame an opening, doable for a confident DIYer but involves some carpentry. Surface-mounted cabinets sit flush on the finished wall and screw directly to studs: no cutting required, making them the easier retrofit option.
Shelving above the toilet is highly efficient: you’re using dead air that nobody occupies. Floating shelves with heavy-duty French cleats or brackets rated for at least 25 pounds work well here. Open shelving feels airy but requires decor discipline: closed cabinets or open shelves with bins hide mess. Corner cabinets (lazy-susan style or just angled shelves) squeeze utility from otherwise wasted space. Remodelista features curated home product guides that showcase smart storage examples and design details worth studying before committing to a layout.
Choosing the Right Cabinet Style for Your Bathroom
Cabinet style should match your bathroom’s existing design and your personal taste, but it also affects durability and maintenance. Solid wood cabinets (oak, maple, cherry) look beautiful and last for decades if well-sealed, but they cost more upfront and need periodic refinishing in humid bathrooms. Plywood with veneer is more budget-friendly and moisture-resistant: quality veneer holds up well if the box edges and seams are properly sealed. MDF (medium-density fiberboard) is economical and stable, but it can swell if water penetrates its edges, so sealing is critical.
Moisture protection isn’t negotiable. Always verify that cabinets are finished with a water-resistant topcoat (polyurethane, lacquer, or waterborne enamel). Interior wood should be sealed too, not raw. If you’re installing a vanity near a tub or shower, allow at least 12 inches of clearance from splash zones, or choose a cabinet with a completely sealed bottom and sealed edge-banding.
Style categories are fairly predictable: Shaker-style (clean lines, recessed panels) works in farmhouse, transitional, and modern bathrooms. Flat-panel or slab-front cabinets feel contemporary. Raised-panel or ornate designs suit traditional spaces. Don’t overthink it, choose what feels right for your home’s overall aesthetic. Houzz’s bathroom remodel ideas provide visual inspiration and real project examples so you can see how different cabinet styles perform in actual homes. Neutral finishes (white, gray, natural wood tones) are safer long-term choices than bold colors, which can feel dated quickly.
Budget-Friendly Storage Solutions & DIY Ideas
If a new vanity or cabinets are out of reach, smart repurposing can solve storage challenges affordably. Over-the-toilet cabinets (a cabinet or shelving unit that sits atop the tank) cost $30–$150 and install in minutes, no tools needed beyond a level. Tension rods under the sink hold spray bottles, cleaning rags, or small baskets. Magnetic strips mounted on walls corral bobby pins and small metal tools. Tiered shelf risers double the usable surface area under sinks without adding bulk.
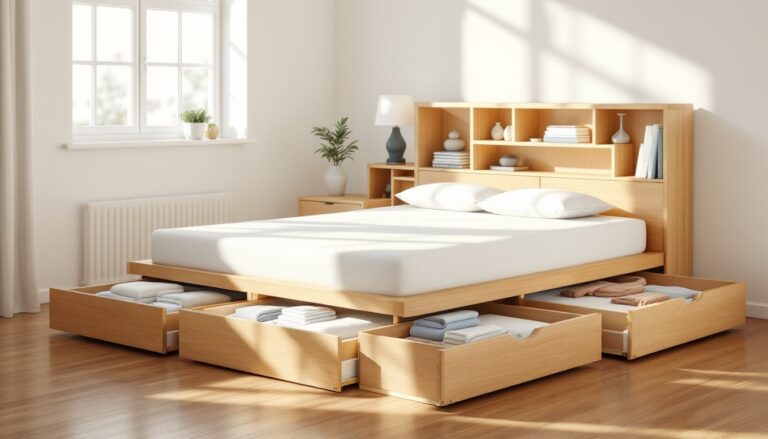
Built-in storage is a DIY project if you’re comfortable with basic carpentry. Floating shelves require finding studs, installing heavy-duty brackets rated for 25+ pounds, and leveling carefully: a stud finder and level are essential tools here. Frame-and-shelving units (like garage shelving repurposed for bathrooms) cost little and you can customize heights to fit your items. Just ensure all fasteners go into studs, drywall anchors alone won’t hold wet-load weight.
Recycling furniture works too: A vintage dresser, small bookshelf, or cabinet from a thrift store can become bathroom storage if you seal it properly and keep it away from direct splash. Real Simple’s home organization tips cover practical decluttering and storage strategies that help you maximize existing space before you build anything new. Bins, drawer dividers, and labeled containers cost almost nothing and transform chaotic cabinet interiors into zones: one bin for hair tools, one for medications, one for cleaning supplies. The key is being ruthless about what deserves the space, expired products and duplicates waste valuable real estate.
Installation & Maintenance Tips
Installing a vanity or cabinet correctly ensures it stays level, sturdy, and protected from water damage. Before anything touches water: seal all raw wood edges, undersides, and interior surfaces with at least two coats of water-resistant sealer or polyurethane. This step is boring and easy to skip, and it’s exactly why many DIY cabinets fail prematurely.
For vanity installation, locate wall studs using a stud finder and use 2.5-inch wood screws or cabinet-specific fasteners to secure the unit to at least two studs (three if it spans a wide wall). Don’t rely on drywall anchors alone: they’ll pull free under wet-load weight. Shim the vanity level side-to-side and front-to-back before fastening, an unlevel cabinet looks sloppy and can cause drawer binding and plumbing stress. Connect supply lines and drain using flexible hose (easier for DIYers than rigid copper) and check for leaks for 24 hours before calling it done.
Maintenance keeps cabinets alive in a moist environment. Wipe spills immediately, water pooling under the sink is the enemy. Check supply-line connections monthly for drips: a slow leak destroys cabinets from the inside out. Ventilation matters: Use the exhaust fan during and for 30 minutes after showers to pull moisture out of the room, not into the walls and cabinets. If shelves are adjustable, check them periodically to ensure pegs are seated firmly and weight is distributed evenly. Keep the area under the sink clear for air circulation: don’t cram it wall-to-wall with products. Every 1–2 years, apply a light coat of water-resistant finish to high-wear areas (cabinet edges, drawer faces). A little preventive care beats a warped cabinet replacement.