

Table of Contents
ToggleA cluttered shelf isn’t just an eyesore, it’s wasted potential. Whether you’re organizing a garage, closet, pantry, or living room, storage bins for shelves are the difference between chaos and a space that actually works for you. The right bins contain mess, protect contents from dust and damage, and make everything easier to find. Choosing storage bins isn’t complicated, but it does require thinking about your space, what you’re storing, and how often you’ll access items. This guide walks you through the options so you can pick bins that fit your shelves and your needs.
Key Takeaways
- Storage bins for shelves eliminate clutter by containing small items, protecting contents from dust and damage, and creating visual calm that makes spaces feel organized and intentional.
- Choose storage bins based on what you’re storing, access frequency, shelf capacity, desired aesthetic, and budget—clear plastic bins work for frequent access, while opaque or wooden bins suit long-term storage and visibility-conscious spaces.
- Measure your shelf width and depth before purchasing bins to ensure proper fit, then account for easy removal by leaving 1–2 inches of wiggle room and labeling contents on the spine for quick identification.
- Plastic bins are the most affordable option at $3–15 each, while fabric bins add style for living rooms, and metal or wooden bins provide durability for garages and heavy-duty storage.
- Distribute weight evenly across all shelves to prevent sagging and structural failure, and verify that your shelf capacity (typically 50–100 pounds per linear foot) can support both bins and their contents.
Why Storage Bins Transform Your Shelving Organization
Bare shelves pile up like a game of Tetris gone wrong. Without bins, you’re stacking loose items, losing things in the back, and creating visual noise that makes a room feel smaller. Storage bins solve this in multiple ways.
They corral small items into unified containers, so nothing gets lost between other objects. A bin of paint supplies, lightbulbs, or craft materials keeps everything visible and accessible without clutter spreading across the shelf. Bins also protect contents, a sealed bin shields off-season decorations from dust, while keeping moisture-sensitive items dry. They’re especially useful in garages, basements, and attics where temperature and humidity fluctuate.
From a design angle, bins create visual continuity. Instead of seeing a jumble of different boxes, bags, and loose objects, your eye sees neat, uniform shapes. That visual calm makes a shelf feel organized even when it’s packed. When your home storage solutions are thoughtful, the whole space functions better and looks intentional.
Types of Storage Bins for Shelves
Not all bins are created equal. Your choice depends on aesthetics, durability, weight, and what you’re storing.
Plastic Bins: Affordable and Lightweight
Clear plastic bins are the workhorses of shelf storage. They’re cheap (often $3–15 per bin), lightweight, and let you see contents at a glance without opening them. Standard sizes, like 32-quart, 41-quart, and 64-quart, fit standard shelf widths and stack neatly. The downside: clear plastic can look utilitarian, and it degrades under UV light over time, becoming brittle. If bins will sit in sunlight or a room with lots of windows, look for UV-resistant plastic or consider opaque bins.
Opaque plastic bins (white, black, or neutral colors) hide contents and look cleaner on display shelves. They’re equally lightweight and affordable, though you lose the see-through advantage. These work great for memorabilia, off-season items, or anything you’re not grabbing constantly.
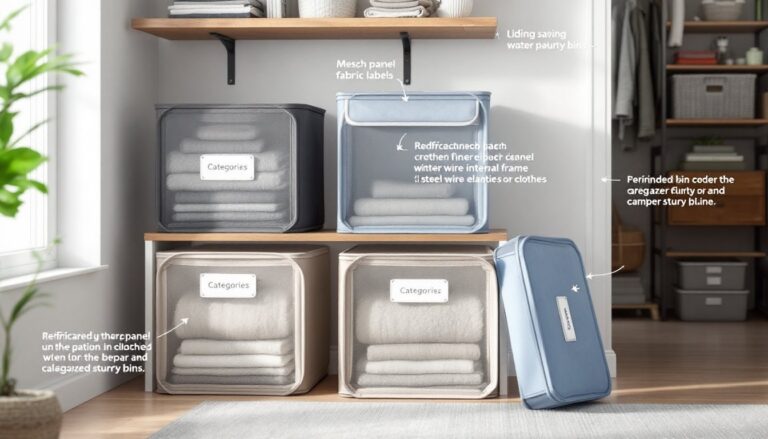
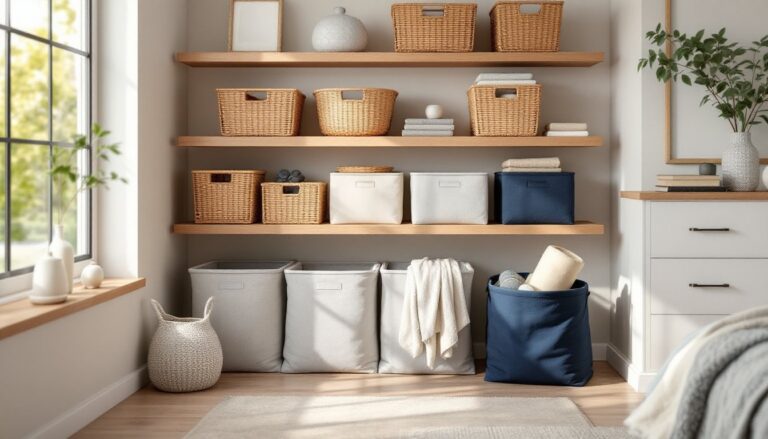
Fabric and Canvas Options: Style Meets Function
Fabric bins (canvas, felt, or cloth) add warmth and texture that plastic can’t match. They’re ideal for living rooms, bedrooms, and other visible shelving where aesthetics matter. Most fold flat when empty, so they take up minimal storage space themselves. But, they’re less protective against moisture and pests, and they don’t stack as stably as rigid bins. A fabric bin works best in climate-controlled spaces for lightweight, non-fragile items.
Woven baskets and rattan bins fall into this category and offer a natural, designer look. They’re durable if made from quality materials, but check weight limits, a woven basket packed with books can be surprisingly heavy and might sag a shelf over time.
Wooden and Metal Bins: Durability and Design
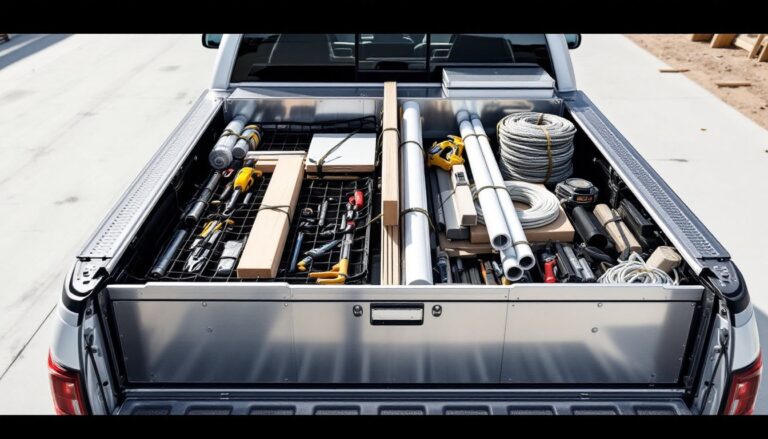
Wooden bins suit rustic, farmhouse, or industrial shelving. Solid wood handles heavy loads and ages beautifully, but bins are more expensive ($40–150+ each) and heavier, so shelf capacity matters. Metal hardware (handles, hinges) adds functionality without sacrificing looks. These are best for permanent fixtures where you want quality that lasts.
Metal bins (steel or aluminum) are built for garages and workshops where durability trumps style. They resist dents, protect contents from critters, and handle temperature swings. Expect to pay $30–100+ per bin. Some have vented sides for air circulation, which is useful in humid spaces.
How to Choose the Right Storage Bins for Your Shelves
Before you buy, answer these questions:
What are you storing? Fragile items need padding and protection (opaque plastic or wooden bins with felt lining). Heavy tools demand rigid, load-rated containers. Lightweight craft supplies work fine in fabric bins. Off-season decor needs protection from dust and light.
How often will you access items? If you’re grabbing things multiple times a week, clear bins or fabric with open tops save time. If bins sit untouched for months, protection matters more than convenience, choose sealed plastic or wooden bins with lids.
What’s your shelf capacity? Add up the weight of what you’re storing plus the bin itself. Most residential shelves hold 50–100 pounds per foot of length, but consult your shelf’s manual or ask a professional if unsure. Heavy wooden bins filled with books might exceed limits: lightweight plastic bins don’t. Storage containers vary wildly in weight and structural integrity, so this matters.
What’s the look you want? In living spaces, mismatched bins create visual chaos. Pick a consistent color, material, and size across a shelf. In garages or utility rooms, function beats aesthetics, but uniform bins still look sharper. Consider whether bin labels are visible, crisp labeling on opaque bins reads cleaner than faded markers on clear plastic.
Budget constraints? Plastic bins are the cheapest entry point ($2–5 per bin on budget brands). Mid-range fabric and composite bins run $10–30. Quality wood or metal bins cost $40+. If you’re setting up an entire closet or garage, bulk pricing through online retailers can help. Budget-friendly storage doesn’t mean skimping on bins entirely, it means picking bins that match the job, not overpaying for features you won’t use.
Measuring and Planning Your Shelving Layout
Guessing on bin sizes leads to waste and frustration. Measure first, buy second.
Measure your shelf width and depth. Grab a tape measure and note the usable space (subtract brackets or shelving supports on the ends). A standard shelf might be 36 inches wide but only 32 inches of actual storage space. Measure depth too, some shelves are 8 inches deep, others 12 or 16. This determines what bin sizes actually fit.
Decide bin arrangement. Will bins sit side by side across the shelf, or do you want them in rows with vertical space above? Sketch it out on paper. If your shelf is 32 inches wide and you want three bins across, each bin needs to be roughly 10 inches wide (leaving gaps for handles). If you want to stack shorter bins on top of taller ones, account for total height, nothing looks worse than bins so tall they rub the shelf above.
Account for easy removal. Bins packed tight edge-to-edge are hard to pull out. Leave 1–2 inches of wiggle room on each side, especially if the bin has handles or a lip you’ll grab. If bins are labeled and frequently accessed, front placement with easy reach matters.
Label before filling. Use a label maker or waterproof tape and a permanent marker. Label bins on the spine or front so you can identify contents without pulling the bin out. This saves time and prevents duplicate purchases (“Wait, didn’t I already buy screws?”). Inventory labels are especially helpful in garages, storage closets, and pantries.
Check weight distribution. Don’t stack all heavy bins on one shelf or all light ones on another. Spread weight across the shelving unit so one shelf doesn’t sag over time. This is critical if you’re using metal shelving in a garage or utility room, unevenly loaded shelves can rack (shift out of square) and eventually fail.